One of the things I struggle most with when coming up with content for Chic Pixel is photos. I’m by no means a pro photographer, but at the very least, my previous apartment was blessed with great lighting that allowed me to pull off relatively decent photos with minimal preparation. My current dungeon of an apartment, however, gets very little light during the day, making it very difficult to pull off anywhere near the quality of photos I was taking before. Combine that with a little nudge from my pal Ayu, and I finally had the push I needed to make my very own light box!
Making your own light box is extremely cheap and easy, so if you have a spare box around, I highly recommend giving it a try! I used this tutorial at Action Figure Fury, which, again, was suggested to me by Ayu. Definitely check out her site – many of the photos in her latest posts were taken using the light box she made, and you can totally see how much it helps! Uses for light boxes are not at all limited to blogging or figure photography, so if you want to try a new look for your photos, give this a shot!
All you need are a pair of scissors, precision knife (it makes cutting out the sides of the box much easier, white tissue paper/tracing paper/cloth (enough to cover three sides of the box), one sheet of heavy paper (white or whatever color you’d like your backdrop to be), tape, and, of course, your cardboard box. A ruler is also recommended if you’d like the windows in the sides to be even, but it’s not really necessary as long as you can make a relatively straight line by hand.
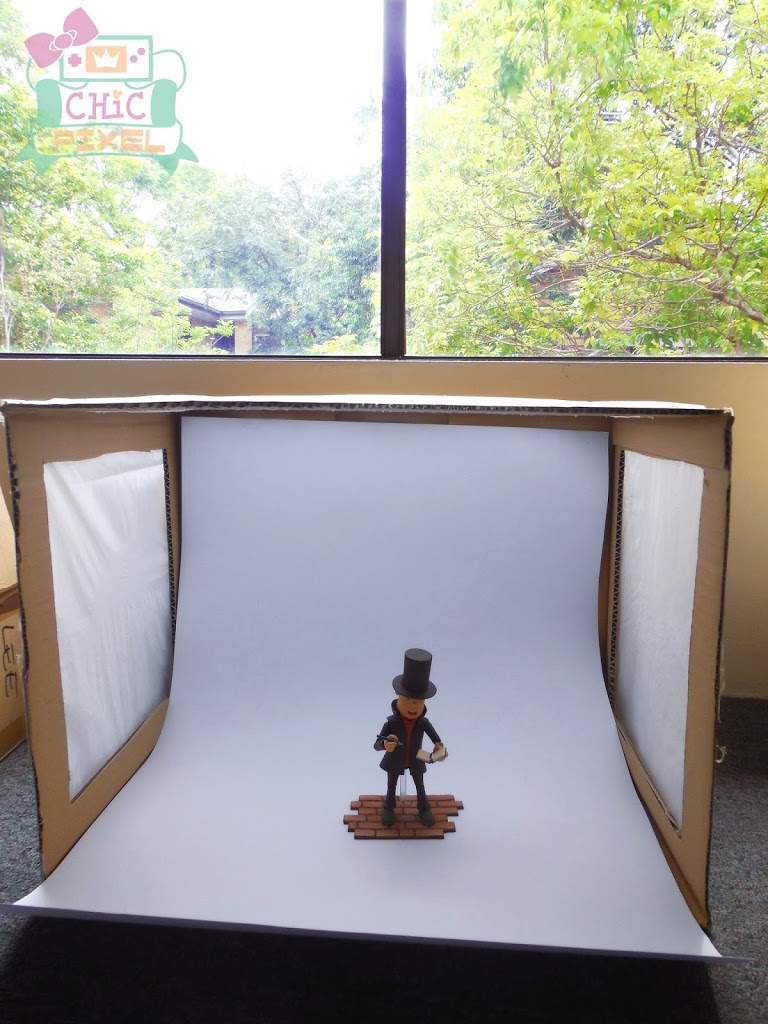
As you can see from my photos, I’ve just cut off the flaps from the top of the box as well as “windows” from three of the sides, leaving about a 1 inch allowance around the edges. Then, you can use your thin paper or cloth of choice and either glue or tape it down (I used tape so I can change to another material if I want), and tape the piece of paper you want to use as a backdrop on the inside! To achieve the “endless” background effect, you want the paper to slope gently and not have any creases in it. That’s it!
My light box only took me about 30 minutes to make and ended up costing less than $5. You’re going to want a box that can fit the objects you’d like to photograph, but also have some room for maneuvering your camera around. I almost wish my box was slightly larger, but it was so easy to do that I’ll probably make another one when I acquire a suitable box!
Also, most people will recommend having three lights, one for each side of the box. I’ll readily admit that less is more for me, and if at all possible, I’d prefer not to have dedicated photography lights sitting around that I need to lug out every time I want to snap some photos. So, I decided to test the box out using the natural light of my study (see first photo for my setup) first to see if it was workable!
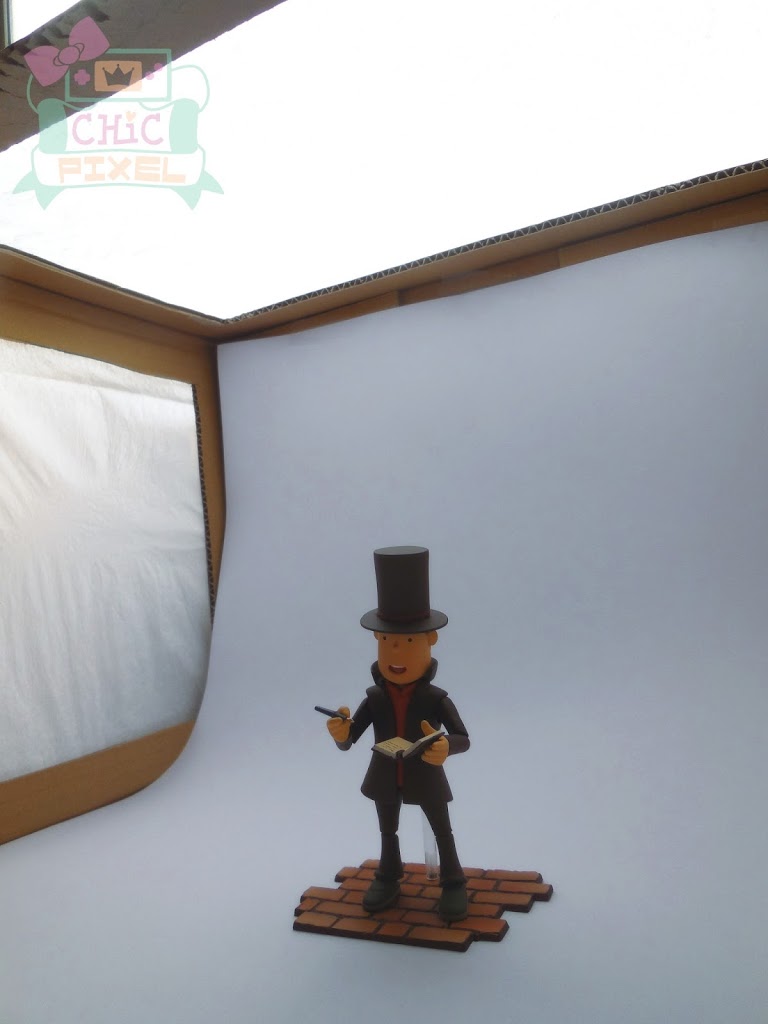
Not bad, if I do say so myself! This photo is completely unedited (aside from the watermark) and was taken with the same camera I use for all the images on my site, in completely natural lighting. I can already see a huge different just by having the light box! Let’s see how the image looks after I work my subpar image editing magic…
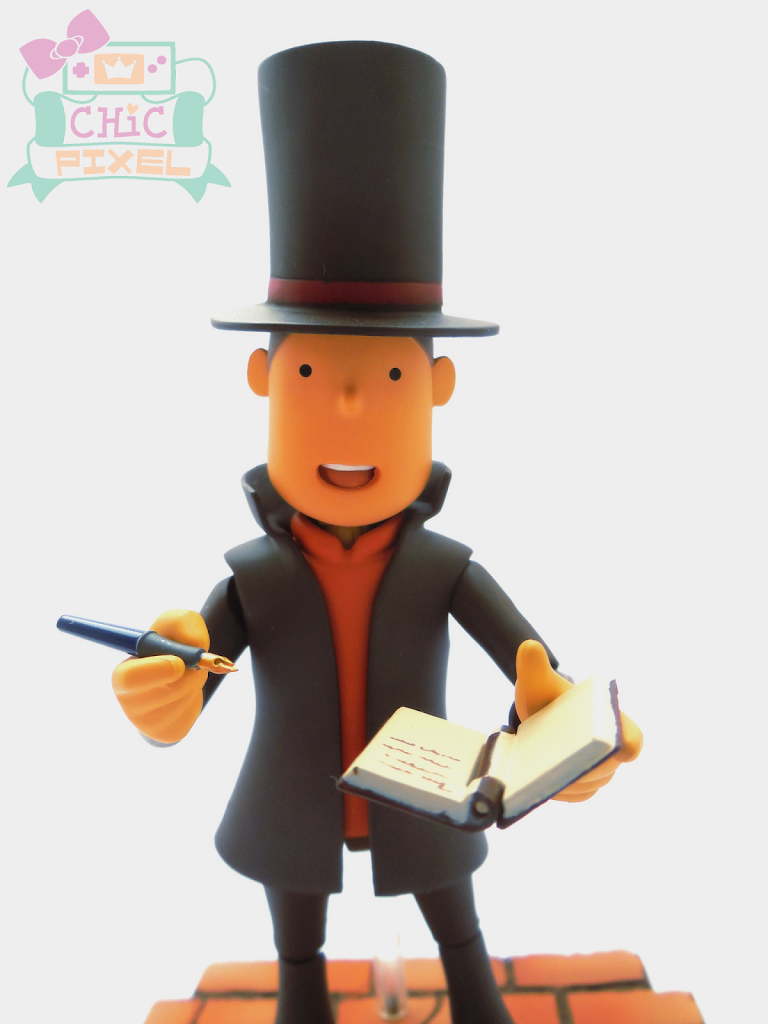
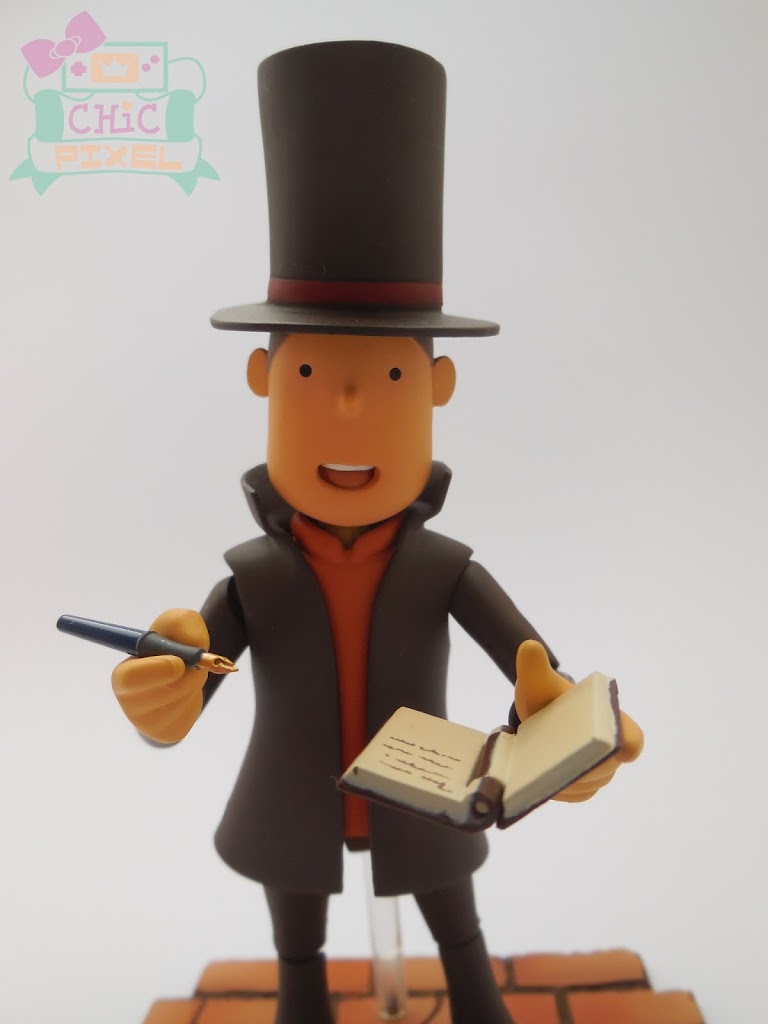
Ta-da! I’m really happy with the result, and think that with some more tweaking such as trying different lighting conditions at different times of the day, I’ll be able to achieve even better photos. No lights required! I highly recommend making your light box first before buying lights (unless you really want them!) to see if you can work with your natural light and purchase lights as a last resort.
I hope you enjoyed this quick tutorial, and if you do end up making a light box of your own, share your spiffy new photos in the comments!
This is really cool, Anne. Thanks for sharing!
This is neat and quite cheap lightbox! 😀 I used to do a PVC pipe like this: http://www.diyphotography.net/how-build-pvc-diy-photo-light-box/ so that I can easily disassemble it. It’s still in Manila. XD But now you’ve given me inspiration to use those overly-sized amazon boxes somewhere! Thanks!